
Claw Clip Hairstyles for Short Hair Tutorial
Claw clip hairstyles for short hair give bobs, lobs and layered cuts simple half-up, twisted and tucked looks, even when the length feels limited. This guide from BabunobGem shows busy women how to pick a clip size, prepare slippery hair and follow easy step-by-step tutorials for everyday styling.
Key highlights
- Clip size matters: mini and medium claws tend to suit short layers better than oversized jumbo clips.
- Base preparation: texturizing spray or a clear micro-elastic can give fine hair extra grip.
- Sectioned styling: half-up twists and faux rolls work with the length you have and leave short nape strands down.
- Simple fixes: twisting the hair upward and stacking two small clips can help a clip sit better in short hair.
Anatomy of Styling Short Hair with Clips
Styling short hair with claw clips works well when the clip size matches your hair volume, rather than trying to clamp every strand at once. For chin-length bobs and shoulder-skimming cuts, smaller clips and half-up placements are usually the easier route.
Short strands pose different challenges than waist-length hair. Long strands create friction against themselves when coiled into a twist, giving claw teeth plenty of bulk to grip. When hair is cut into a bob, lob or layered shag, there is less length to wrap around the clip hinge, and a clip that is too heavy or wide can simply drop under its own weight.
To get the hang of short hair claw clip styles, it helps to see how clip size interacts with your cut and hair density. A clip that suits your hair can make daily styling quicker.
Understanding Clip Sizes: Micro, Mini, and Medium Claws
Clip size often decides whether an accessory stays anchored or slides loose. Oversized five-inch claw clips tend to be a poor match for short hair because there is not enough hair mass to fill the wide cavity between the teeth. To compare sizes and shapes in more detail, read our overview of the types of claw clips.
Micro clips measuring under one inch can work for pinning back bangs, side-swept fringe or a pixie cut. Mini clips of roughly 1.5 to 2 inches are a practical size for chin-length bobs, because they gather a crown section without adding much weight. Medium clips of about 2.5 to 3.5 inches suit shoulder lobs, with enough space to hold a folded twist.
Hair Lengths and Density: Bobs, Lobs, and Pixie Cuts
The architecture of your haircut directly influences how you position hair clips. A blunt chin-length bob features even perimeter weight, meaning upper crown sections reach back easily while lower nape hairs remain too short to reach a high gather.
Layered cuts and modern shags have natural texture, but shorter layers can slip free if the clip placement is too broad. Fine short hair often does better with narrow tooth spacing, which gives silky strands less room to escape. Dense, thick short hair may need a clip with a wider opening or two small clips side by side, which spreads the weight across the hair. If your hair keeps growing, this guide to hair clips for long hair shows what changes with extra length.
Grip: Smooth Acrylic vs Textured Surfaces
Material texture can affect how well short hair with clips stays put. Polished acrylic and slick plastic clips offer little surface resistance, and on fine or freshly washed hair, glossy teeth tend to glide downward as you move.
Some clips have a textured or fabric-covered surface, which can give strands a little more to grip than slick plastic, although results vary from clip to clip. For women who like cottagecore style and understated vintage details, a hand-embroidered clip adds a soft, handcrafted look on top of its everyday function. You can see our handcrafted embroidered claw clips here, which add a soft texture to short styles.
| Hair Length and Cut | Clip Size to Try | Placement Area | Styling Objective |
|---|---|---|---|
| Pixie Cut (1–2 in) | Micro claw (under 1 in) | Side temple or fringe line | Decorative accent and keeping bangs swept back |
| Bixie / Grown Pixie (2–3 in) | Micro to mini claw (1–1.5 in) | Upper crown gather | Gentle crown lift and securing front layers |
| Chin Blunt Bob (4–6 in) | Mini claw (1.5–2 in) | Mid-crown half-up | Gathering face-framing strands away from face |
| Layered Chin Shag (4–6 in) | Narrow mini claw (about 2 in) | High crown twist | Textured half-up with soft tendrils left loose |
| Collarbone Lob (7–9 in) | Medium claw (2.5–3.5 in) | Lower nape fold | Gathering hair into a neat, folded low updo |
| Layered Shoulder Lob (8–10 in) | Medium claw clip (3 in) | Vertical mid-back seam | Classic French twist with tucked ends |
| Fine Short Hair (Any cut) | Small, lightweight claw | Crown half-up anchor | Giving fine strands something to grip |
| Dense / Thick Bob (4–7 in) | Wide-cavity medium or twin minis | Sectioned side-by-side | Spreading thick hair across two clips |
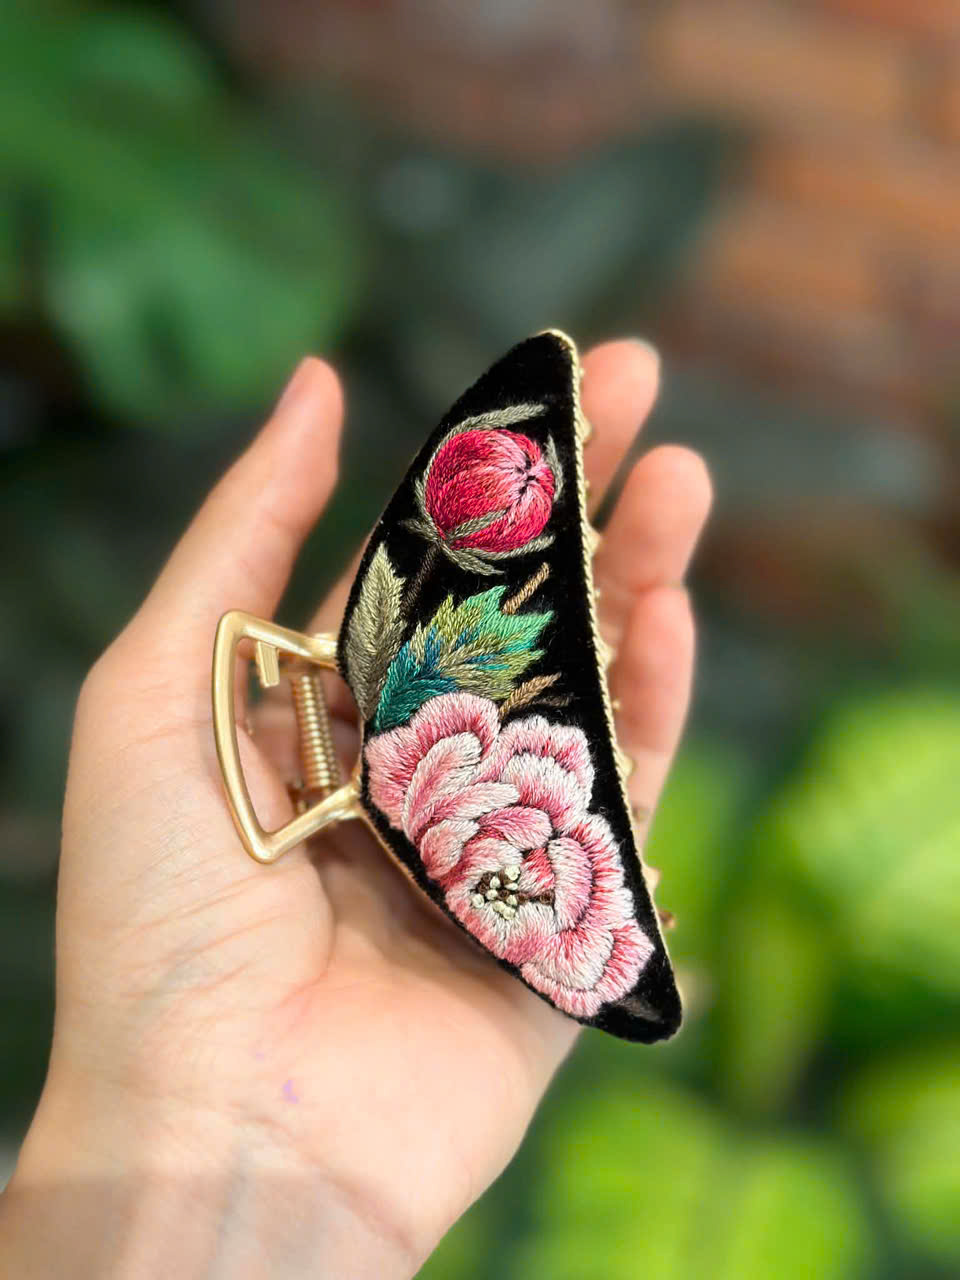
If heavy, smooth clips keep sliding out of your shorter layers, a hand-embroidered claw clip may be worth trying. Ours is suited to half-up styles and fine hair.
How to Wear a Claw Clip with Short Hair Step by Step
To wear a claw clip with short hair, section hair from above the ears, twist the gather upward to form an anchoring ridge, and position the clip directly over the base. Working in half-up sections helps short layers stay anchored.
If you have ever felt your hair too short for claw clip styles, a change in placement often helps more than waiting for your hair to grow. Long-hair tutorials usually start by twisting a long length of hair into a bun. For shorter cuts, we focus on modular styling: gather the strands that reach easily, anchor them, and let the lower nape layers rest naturally.
Follow these practical steps to create claw clip hairstyles for short hair that look intentional.
Step 1: Prep Hair Texture and Create Base Grip
Clean short hair is often silky and slippery, causing hair accessories to lose their grip quickly. Before styling, apply a texturizing product to give your strands workable friction.
Mist a light sea salt spray, dry shampoo or texturizing powder through your roots and crown. Use your fingers to work the product into the hair, creating a little volume. Avoid heavy silicone serums or slippery oils right before styling, as these coat the hair and can make clip teeth glide off. If your hair is very fine, teasing lightly at the crown can give the teeth a firmer base to grip.
Step 2: The Half-Up Crown Twist for Chin Bobs
The half-up crown twist is a popular short hair claw clip style for chin-length bobs. It pulls face-framing strands back from your eyes while showing off your haircut’s natural shape. Once the half-up twist feels easy, you can explore more hair claw clip styles for other lengths.
Part your hair naturally, then use your thumbs to trace backward from above your ears toward the crown. Gather this top section and twist it upward toward the ceiling one or two turns. Twisting upward creates a raised horizontal ridge against your head. Open a mini claw clip (around 1.5 to 2 inches), set the teeth over the twisted ridge, and clamp down so the lower teeth catch a little hair beneath the twist.
Step 3: The Short-Hair French Twist Tuck for Lobs
Collarbone-length lobs have enough length to form a modified French twist if you fold the ends inward rather than coiling them around a base.
Gather your hair at the nape of your neck as if making a low ponytail. Twist the gather upward along the back centerline of your head. Because shorter ends will stick out at the top, fold those ends back down against the twist, tucking them under the roll. Take a medium claw clip (2.5 to 3.5 inches) and clamp vertically along the twist seam, catching both the rolled hair and the hair beneath it to hold the fold in place.
Step 4: The Double Mini-Clip Anchor for Thick Strands
Women with thick, dense short hair often find that a single small clip cannot close around their hair volume, while larger clips slide off. Using two mini clips can help with this.
Divide the top half of your hair into two horizontal tiers across the crown. Gather the upper tier, twist it upward, and fasten it with your first mini clip. Gather the tier directly below it, twist it upward, and fasten the second mini clip right beneath the first. This stacked arrangement spreads the hair’s volume across two hinges, so each clip has less to hold. For small sections near the face, you can also see our embroidered snap clips here.
Step 5: The Faux Bun Roll for Layered Shags
Layered cuts look great with a relaxed faux bun roll that embraces wispy ends and natural movement.
Gather the top half of your hair at the upper crown, leaving curtain bangs or temple tendrils loose around your face. Twist the gathered section into a small loop, folding the tail back toward the base rather than wrapping it around. Clamp a medium claw clip over the center of the folded loop. Let the feathered ends of your layers fan out naturally above the clip for a relaxed, vintage-inspired finish.
Step 6: Securing Stray Nape Layers and Finishing
When styling short hair with clips, lower nape strands often drop out because they are simply too short to reach a mid-head gather.
You can let these lower strands hang naturally to frame your neck, which gives the style a soft, modern feel. If you prefer a fully pinned-up look for work or warm weather, twist the loose nape strands upward and pin them with two small bobby pins or a snap clip placed just below the main claw clip. A light mist of flexible-hold hairspray can finish the look. For tidy finishing touches on loose nape layers, you might also enjoy these barrette hairstyles.
Experience from Our Studio: Hold and Styling Tips
Short hair styling tends to go better when you anchor clip teeth against a twisted hair base and choose a clip that matches your hair volume. Small sections and a hidden micro-elastic can cut down on midday adjustments.
In our Ho Chi Minh City studio, we hand-embroider accessories in small batches, mainly on natural linen. Clips that slip out of short hair are a common frustration, so here are four practical techniques we like to share from our studio bench.
Studio Tip 1: Twist Upward, Never Downward When gathering short hair into a half-up style, try rotating your twist upward toward the top of your head before clipping. Twisting downward creates a slide that lets hair slip out under its own weight as you walk. Twisting upward folds the hair against itself, creating a natural shelf where the lower teeth of your claw clip can sit against your head.
Studio Tip 2: The Hidden Clear Elastic Technique For ultra-fine or silky hair that slips out of every clip, try a clear silicone micro-elastic as an invisible anchor. Gather your half-up section and secure it with the micro-elastic loosely at the crown. Then twist the ponytail once and clamp your claw clip directly over the elastic band. The teeth of the clip can catch behind the rubber ring, which gives the clip something to rest against so it slides down less.
Studio Tip 3: Pair Embroidered Clips with Natural Linen Headbands Short hair looks charming when you combine styling at the back with something to frame the front. Pair an embroidered claw clip holding your crown layers with a hand-embroidered linen headband, 1.2 in (3 cm) wide, at your hairline. A headband can sweep short fringe and flyaways back from your forehead, while the hand-embroidered claw adds handcrafted texture at the back for a cohesive cottagecore look. You can also see our pink hair clips here, including an embroidered oval barrette for the back.
Studio Tip 4: Spot Clean Embroidered Clips Embroidery needs gentle care. Avoid soaking embroidered clips in water or washing them in a machine. To refresh a clip after styling product buildup, wipe it lightly with a damp cloth and let it air dry naturally away from direct heat.
Common Mistakes When Using Short Hair Clips
Common mistakes when styling short hair include using oversized clips that overwhelm short strands, clamping hair too flat, and pulling edges too tight. Matching the clip to your hair volume and keeping the tension light are the simplest fixes.
Learning how to wear a claw clip with short hair is largely about unlearning long-hair habits. Short hair has its own balance points, and forcing short strands into styles designed for waist-length hair often leads to frustration and slipping clips. Here are three common pitfalls and how to correct them.
Mistake: Choosing Jumbo Clips Designed for Long Hair Using an oversized 4- or 5-inch claw clip on a short bob is a common reason clips fall out. Large clips have wide cavities meant to hold a lot of hair. When clamped on short hair, the teeth may not touch the strands with enough pressure, so the clip can tilt forward or drop off. The fix: try mini claws (1 to 2 inches) or narrow medium clips that match the actual volume of your hair section.
Mistake: Pulling Hair Excessively Tight at the Temples When short layers start slipping, the natural instinct is to pull front sections backward as tightly as possible before clamping. However, pulling hair taut puts strain on your scalp. The American Academy of Dermatology notes that hair pulled back tightly over and over can cause traction alopecia, a type of hair loss. The fix: keep the tension light, let a few soft tendrils rest around your ears, and take the clip out if your scalp feels tight or sore. If that continues, see a doctor, or a dermatologist if you notice thinning. If you wonder whether daily wear is a concern, read are claw clips bad for your hair for gentle guidance.
Mistake: Clamping Hair Flat Against the Crown Without Volume Smoothing short hair completely flat against the head before clamping creates an unbalanced silhouette that makes the clip look harsh and disconnected. It also reduces friction, making it easier for fine strands to slide out. The fix: after clamping your claw clip, use your fingertips to gently pull upward on a few crown strands. This micro-pinch can add soft height, soften parting lines and help the clip teeth settle into the hair.
Claw Clip Hairstyles for Short Hair FAQ
How do you wear a claw clip if your hair is too short for a full twist?
Focus on half-up styling rather than gathering your entire head of hair. Gather the top section from your temples to the crown, twist it upward one turn, and clamp a mini claw clip over the twist. Leave the lower nape layers down to frame your neck naturally.
What size claw clip suits chin-length bobs?
A small or mini claw clip of roughly 1.5 to 2 inches is a good starting point for chin-length bobs. It has enough clamping surface to gather a crown section without adding much weight.
Why do claw clips keep slipping out of my short hair?
Clips often slip because the hair is very silky or the clip is too large for the amount of hair you are gathering. Texturizing spray, a smaller clip or a hidden clear elastic under the clip can help.
Can I do a full updo with short hair using a claw clip?
A full updo is more realistic if your hair reaches your collarbone (a lob). For chin-length cuts, nape layers are often too short to reach a high clip, so use small bobby pins or snap clips to pin nape pieces upward toward the main claw.
How do I style short layers with a claw clip without pieces falling out?
Embrace the layered texture by letting shorter face-framing pieces fall free. Secure only the mid-crown layers where lengths meet, twist upward, and clamp with a medium or narrow claw clip, allowing layered ends to flare naturally above the hinge.
Embracing Slow Craft and Everyday Hair Styling
Styling short hair with clips takes some trial and error, and small placement changes can help. At BabunobGem, we hand-embroider hair accessories in small batches in our Ho Chi Minh City studio, mainly on natural linen. Orders are usually prepared in 1–3 business days, delivery to the US is estimated at 10–14 business days with tracking, and returns are accepted within 30 days under our Return Policy. We hope these ideas help you find a look you enjoy.
New here? Get 10% off your first order
Join our list for new small-batch designs and restocks, or browse the collection now.
Note: Each piece is embroidered by hand, so stitches and colors can vary slightly from the photos. Fit and feel depend on head size, hair type and how you wear it. This guide is for general information only.