
How to Use a Scrunchie for Braids
Scrunchie for braids styling methods bring balance, vintage charm, and a soft fabric finish to classic plaits, Dutch weaves, and segmented bubble tails. Written for everyday braiders looking for a softer finish, this mindful guide from BabunobGem explores fabric selection, tension control, and practical steps to finish braids neatly.
Key highlights
- How fabric-covered elastics may be gentler than thin bands on plait ends.
- A material comparison of linen, silk, velvet, and cotton for braided styles.
- Step-by-step methods for classic tails, crown accents, and segmented bubble plaits.
- Studio tips for helping a scrunchie stay put and avoiding excessive scalp tension.
Why Use a Scrunchie for Braids? A Softer Finish and Balanced Texture
Using a scrunchie for braids can be gentler on tapered ends than a thin elastic, since the fabric spreads pressure over a wider area and adds balanced volume to woven styles.
Braiding compresses hair into interwoven sections that taper toward the tips. While loose ponytails hold thick strand clusters, plait ends narrow into thin, vulnerable groupings. Standard thin bands pinch this small section tightly. Over time, that concentrated pressure can stress the outer cuticle, may break fragile strands, and can leave creases that linger after unplaiting.
A scrunchie replaces harsh contact points with gathered fabric. The textile creates a soft buffer around the inner elastic core. This layer can spread the hold over a wider area rather than focusing pressure along a single sharp line.
Friction Reduction on Tapered Plait Ends
Plait tails contain the oldest, most weathered sections of your hair shaft. These ends have endured heat styling, environmental exposure, and daily brushing. When you twist thin elastics or rough bands around them, tiny snags can lift the delicate cuticle layer. Repeated friction may contribute to split ends and breakage.
Fabric-covered ties are often gentler than thin elastics. When wrapped around a plait tail, the outer textile can move with the hair rather than scraping against individual strands, which may make it easier to unwind the style at night.
Visual Balance Between Braid Density and Accessories
Braided hairstyles carry distinct visual weight. Chunky Dutch braids, textured fishtails, and voluminous French plaits command attention along the head. Finishing a thick, dimensional braid with an invisible plastic mini-band creates an abrupt, unbalanced silhouette where the hairstyle suddenly vanishes into a tiny tail.
Adding a gathered fabric scrunchie introduces proportional harmony. The ruffled silhouette echoes the overlapping curves of the plait. Whether you prefer muted natural tones or embroidered botanical details, the fabric ties the look together, creating an intentional, cottagecore aesthetic from root to tip. For a nostalgic spin on this look, explore our 90s hairstyles with scrunchies for more inspiration.
Material Dynamics: Evaluating Fabrics for Braided Hold
Different textile fibers interact uniquely with plait patterns. Smooth weaves glide along hair strands, while natural textures provide light friction that can help reduce slipping. Understanding these interactions helps you select the right accessory for your hair density and chosen braid style.
Natural linen and structured cottons have a bit of texture, which some braiders like for straight or silky hair that tends to unravel. Silk and satin are smoother and glide over the hair. Heavier textiles like velvet add visual weight and are often chosen for thick, multi-strand plaits. Fabric choice matters, and our guide on are cotton scrunchies good for hair looks at one popular option.
| Fabric Type | Grip on Braided Hair | Tension on Tail Ends | Good for These Braids |
|---|---|---|---|
| Silk | Smooth and low friction | Light hold | Soft finishes and lighter plaits |
| Natural Linen | Textured weave | Moderate hold | Everyday three-strand braids, cottagecore styles |
| Cotton Lawn & Voile | Consistent, dependable grip | Moderate, even distribution | French and Dutch braid ends, casual daily plaits |
| Crushed Velvet | Firm grip against hair shafts | Cushioned, supportive hold | Thick heavy plaits, winter styling, half-up knots |
| Cotton Jersey Knit | Flexible with slight stretch | Gentle, adaptive pressure | Gym braids, active wear, relaxed low twists |
| Chiffon & Georgette | Lightweight and fluid | Low tension, minimal weight | Boho fishtail ends, accent braids, special events |
| Ribbed Corduroy | High mechanical friction | Structured, firm hold | Coarse hair, bulky crown braids, autumn looks |
| Satin Polyester | Sleek surface glide | Low friction, light tension | Protective overnight braids, curly plait ends |
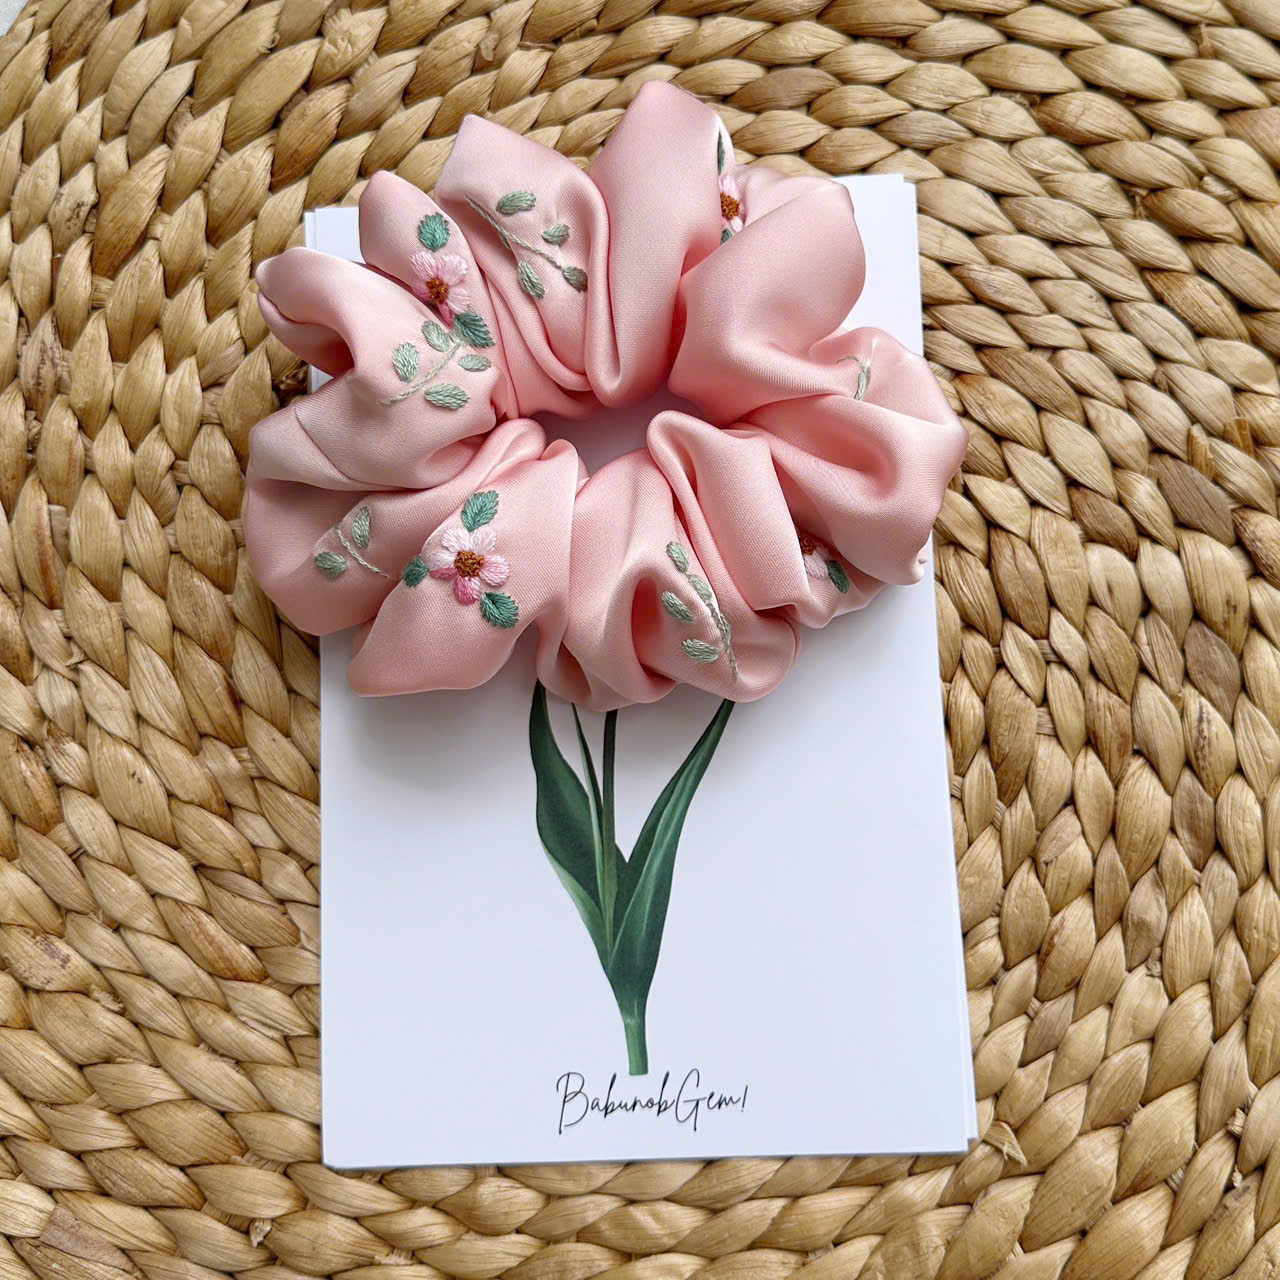
Looking for a scrunchie with a handmade touch? The Wildflower Silk Scrunchie features wildflower embroidery and comes in 6 colors.
Step-by-Step: How to Style and Secure Braids with Scrunchies
To use a scrunchie for braids, plait hair to your desired stopping point, anchor the tail with two to three gentle fabric loops, and loosen plait ribs to balance volume.
Mastering braided styles with fabric accessories requires proper sequencing. Rushing the anchor or misjudging loop tension can cause plaits to unravel or pull uncomfortably along the scalp. Following a clear routine can help you build balanced hairstyles that stay tidy through your day.
Step 1: Prep Hair Texture and Section Even Strands
Clean, freshly washed hair often lacks the grip required to hold braided structures firmly. Start by brushing through lengths to eliminate tangles. If your hair is particularly fine or slippery, mist lightly with water or work a pea-sized amount of leave-in cream through dry ends to encourage strands to cling together.
Divide your hair into three equal sections. Uneven sections create irregular plait ribs, leading to loose loops that slip out from under your hair accessory later in the day. Keep your hands close to the head while working to maintain uniform tension without pulling tightly on roots.
Step 2: Form Your Chosen Braid Pattern
Choose your plait pattern based on the silhouette you want. A classic three-strand plait offers a relaxed everyday finish. French braids weave hair over the center strand for a smooth, flat foundation, while Dutch braids cross under the center strand, lifting the plait outward for dimensional contrast. If you want a raised, dimensional plait, learn how to do a dutch braid on yourself.
Continue braiding downward until you reach two to three inches above your hair ends. Stopping too close to the very bottom leaves insufficient hair for the scrunchie to grip, which can cause the fabric to slide off during movement. Leaving a modest tail provides the cushion needed for a stable anchor. Braids that end in a ponytail are covered in our guide on how to do the ponytail braid.
Step 3: Anchor the Tapered Tail with Gentle Loops
Hold the plait base firmly with one hand while gathering the tail. Slide the scrunchie over the plait end with your free hand. Twist the accessory into a figure-eight loop and pull the hair tail through a second time. Depending on your hair thickness, two or three loops typically provide a secure hold.
Avoid over-twisting the elastic into a tight knot. The beauty of a fabric tie lies in its cushioned hold. If your hair is very fine or straight, you can place a tiny clear mini-elastic at the bottom first, then cover it completely with your fabric scrunchie to blend functional grip with textile beauty. If the scrunchie feels loose after a few hours, gently re-wrap it instead of pulling the braid tighter.
Step 4: Construct a Romantic Bubble Braid with Multiple Scrunchies
Bubble braids offer a whimsical alternative to traditional woven plaits. To create this style, gather hair into a ponytail at the crown or nape and secure it with an initial scrunchie. Move down two to three inches along the ponytail shaft and wrap a second scrunchie securely around the strand. If you enjoy playful ponytails, you may also like our twist ponytail styles.
Hold the lower band firmly with one hand. With your other hand, use your fingertips to gently pull hair outward between the two scrunchies, creating a rounded, voluminous bubble. Repeat this process down the length of your ponytail, spacing bands evenly until you reach the tail.
Step 5: Finish Half-Up Braids and Crown Accents
For half-up styles, separate a two-inch section of hair from above each temple. Weave each section into a neat three-strand braid, angling both plaits toward the back of your head. Bring the two braided tails together at the occipital bone.
Join both plait ends into a single cluster and wrap a scrunchie around them twice. A linen bow scrunchie can add a decorative finishing touch here, resting against your loose lower hair while holding both accent braids together.
Step 6: Pancake Plait Edges for Proportional Harmony
Once your scrunchie is securely positioned, examine the overall shape in a mirror. Traditional tight braids can look narrow compared to the gathered diameter of a fabric scrunchie. Pancaking restores balanced proportions across the entire hairstyle. For a broad, flat plait that shows off a scrunchie, try our beaver tail braid tutorial.
Starting just above the scrunchie, gently tug outward on the outer curve of each plait rib using your thumb and forefinger. Work your way upward toward the base of the braid. This subtle easing fluffs the braid width, matching the generous silhouette of your fabric accessory without compromising internal plait tension. Small tugs are easier to adjust than one big pull, so go slowly.
Studio Tips for Balancing Grip, Volume, and Fabric Aesthetics
Studio styling balances hair density with fabric weight, uses anchor points for tapered tips, and keeps hand-embroidered motifs positioned outwardly.
Working daily with textiles and hair accessories teaches you subtle nuances that transform everyday styling. From adjusting plait volume to protecting hand-stitched motifs, these studio tips help you get the most out of your fabric hair pieces.
Balance Accessory Weight with Braid Density: It helps to consider fabric weight before choosing an accessory. A thick Dutch braid woven from coarse or dense hair can easily support heavy linen, corduroy, or crushed velvet. However, if you are braiding fine hair or styling delicate side accent plaits, heavy fabrics can pull the plait downward. For fine strands, lighter options such as a smaller scrunchie or compact button hair ties may drag less on the braid. If your hair is fine, you may also like our article on choosing a scrunchie for thin hair.
The Folded-Tail Technique for Slippery Hair: If your hair ends are blunt or prone to sliding out of fabric wraps, fold the last inch of your plait tail upward into a small loop before making your final scrunchie turn. Wrapping the fabric around this doubled-over loop doubles the thickness at the anchor point. This gives the inner elastic a sturdier base to grip, which can help keep the scrunchie from sliding downward.
Positioning Hand-Embroidered Artwork Outward: When using accessories with botanical embroidery, pay attention to the final elastic twist. During the second or third pass, guide the embroidered motif so it faces forward or outward rather than turning inward against the neck. Never pull rough plait ends across raised threadwork. Gently smoothing fabric folds by hand shows off the craftsmanship and can reduce friction on embroidery stitches.
Refreshing Second-Day Braids without Full Re-weaving: If you wore a plait yesterday and want to refresh the look without starting over, unwrap the scrunchie gently. Smooth a single drop of hair oil over the flyaways along the braid body. Re-tighten only the bottom two crosses of the plait, then re-secure the tail with an embroidered tie. Loosening the outer ribs slightly gives second-day hair a soft, intentionally bohemian texture. For curly textures, our hair ties for curls article offers more ideas for refreshing a style.
Common Braiding Mistakes with Scrunchies and How to Fix Them
Common styling mistakes include pulling roots too tightly, over-twisting elastics on thin tips, and dragging textured fabrics roughly down plait tails.
Even experienced braiders occasionally struggle with loose holds, strand snapping, or awkward silhouettes. Avoiding these common mistakes can help your braided hairstyles look tidy through the day.
Mistake: Pulling plait roots excessively tight during the initial anchor wrap. Many people pull hair taut at the scalp in an effort to make braids hold longer. However, hair pulled back tightly over and over can cause traction alopecia, a form of hair loss, as noted by the American Academy of Dermatology. To avoid this strain, braid with relaxed hands instead of pulling at the scalp to make the style last. If your scalp feels sore or you notice thinning, take the style out and see a doctor or dermatologist.
Mistake: Forcing too many elastic rotations around a thin plait tail. When a braid tapers down to a narrow point, braiders often twist an oversized scrunchie four or five times to create a tight grip. Over-twisting bunches the fabric awkwardly, hides decorative embroidery inside tight folds, and places concentrated pressure on fragile tips. Instead, use an accessory sized appropriately for your tail diameter, or fold your hair ends upward to add volume before your final wrap.
Mistake: Dragging embroidered scrunchies downward to remove them. Yanking a scrunchie straight down the length of a braid catches hair cuticles and rubs delicate embroidery threads against dry strand ends. This can fray embroidery stitches and pull on the hair. Always unwind the scrunchie loop by loop with your fingers, lifting the fabric cleanly away from the plait before unraveling your hair strands.
Scrunchie for Braids FAQ
How do I keep a silk scrunchie from sliding off the end of a braid?
Silk is naturally smooth and offers minimal surface friction, which can allow it to slide on sleek or straight hair. To prevent slipping, anchor your plait tail with a tiny clear elastic first, then wrap your silk scrunchie over it. Alternatively, fold the bottom inch of your plait upward into a loop before your final wrap to give the fabric a thicker anchor point.
Can you use regular scrunchies for bubble braids, or do you need mini sizes?
Regular scrunchies work well for bubble braids, especially if you want a bold, romantic cottagecore look with dramatic visual separation. Mini scrunchies create smaller, tighter bubbles suited for fine hair or half-up styles. For a balanced appearance, match your scrunchie diameter to your overall ponytail thickness.
Is it better to secure a braid with a rubber elastic before adding a scrunchie?
For fine, slippery, or heavily layered hair, using a small base elastic before adding your scrunchie can add extra hold. The inner band can help keep short layers from escaping the plait, while the outer fabric scrunchie softens the look and adds decorative charm. If a braid feels tight at the scalp, loosen it rather than adding more elastic.
How should I clean and care for a hand-embroidered scrunchie?
Hand-embroidered accessories require gentle care to preserve delicate stitches. Do not wash them in a machine or submerge them in water. Instead, spot clean gently using a soft, damp cloth. Lay the scrunchie flat on a clean towel to air dry away from direct heat.
Which size scrunchie should I choose for French braids versus fishtail braids?
French braids carry substantial volume and pair naturally with medium to oversized linen or bow scrunchies. Fishtail braids are typically tighter and flatter, tapering to a narrower point. A smaller scrunchie or embroidered hair tie can suit a fishtail plait without overpowering its woven texture.
Embracing Mindful Braided Styles with BabunobGem
Braiding hair is an everyday ritual that connects personal expression with a little everyday care. At BabunobGem, every linen headband, clip, and botanical scrunchie is embroidered by hand in small batches in our Ho Chi Minh City studio. Most items are under $25. Orders are usually prepared in 1–3 business days, and US delivery is estimated 10–14 business days, with tracking. Find your mindful styling companion for every plait.
New here? Get 10% off your first order
Join our list for new small-batch designs and restocks, or browse the collection now.
Note: Each piece is embroidered by hand, so stitches and colors can vary slightly from the photos. Fit and feel depend on head size, hair type and how you wear it. This guide is for general information only.