
Ponytail and Hair Down Hairstyles
Ponytail and hair down hairstyles bring together the lift of an upward gather with the soft movement of flowing lengths. This studio guide shows women how to balance volume, go easy on the roots, and style relaxed half-up looks using gentle techniques and botanical accessories from BabunobGem.
Key highlights
- How to section hair cleanly between the crown and nape to achieve balanced weight distribution.
- Gentle fastening techniques that keep tension on the scalp low.
- Texture-specific adaptations for fine, thick, wavy, curly, and coily strands.
- Studio tips on pairing handcrafted linen scrunchies, button hair ties, and botanical headbands with half-up looks.
Understanding the Ponytail and Hair Down Aesthetic
A ponytail and hair down hairstyle combines an anchored crown gathering with loose lower layers, offering natural facial framing and a relaxed daytime look. This hybrid look balances the structural lift of an updo with the soft, organic movement of open hair across diverse textures and lengths.
In hair design, the half-up silhouette bridges formal discipline and everyday ease. By lifting the upper canopy away from your temples and forehead, you can brighten the look of your facial features, show off cheekbones, and keep loose strands out of your eyes during busy daily routines. Meanwhile, leaving the lower half of your hair free creates a soft cascade across your shoulders that softens shoulder lines and collarbones.
Unlike a traditional full ponytail that gathers the entire weight of your hair at a single anchor point, a ponytail with hair down distributes mass into two distinct zones. The upper section carries just enough hair to build height at the vertex, while the base section rests naturally against your back. This separation can reduce downward drag on your hairline, making it a handy choice for long days at work, outdoor weekend strolls, or quiet creative mornings. For a more relaxed, lived-in version, our messy ponytail ideas are a fun place to start.
Crown Lift and Cascading Lengths: The Structural Balance
Achieving a balanced ponytail and hair down silhouette depends on where your upper anchor sits relative to your head shape. The human skull features a natural apex near the crown, transitioning downward toward the occipital ridge. When you position a half-up gathering directly at the crown, the lifted strands form a slight canopy that can add visual height, which may flatter rounder facial shapes and softer jawlines.
Conversely, securing your upper gathering lower down, closer to the occipital bone, yields a grounded, romantic cottagecore drape. This lower placement keeps the crown relatively flat while allowing the ponytail strands to blend almost seamlessly into the cascading hair underneath. Some women with longer or oval facial structures like this relaxed, low-slung gathering because it avoids adding extra vertical height while keeping feminine movement.
Parting Geometry: Ear-to-Ear vs. Temple Sweeps
The parting line you draw across your scalp determines how much hair enters the anchor and how much stays down. A traditional ear-to-ear section splits your hair roughly fifty-fifty. While this provides substantial hair to build a bouncy upper ponytail, it can leave the lower cascade feeling thin if your hair is naturally fine or layered.
A temple sweep, by contrast, gathers strands starting above the temples and angles upward in a gentle V-shape or soft crescent toward the crown. This technique captures roughly one-third of your overall hair volume. It keeps more density in the lower lengths, so your open hair can look fuller. A soft curved parting also avoids exposing harsh scalp lines, blending the upper and lower sections naturally.
Adapting to Natural Textures and Densities
Every hair texture interacts differently with a ponytail and hair down style. Straight, sleek strands tend to reveal parting lines clearly and may experience elastic slippage if the fastener lacks textural grip. For fine, straight hair, preparing strands with light texturizing mist and choosing fabric-covered fasteners, such as linen scrunchies or fabric snap clips, can provide gentle friction for delicate cuticles. Fabric choice matters for gentle grip, and our guide on are cotton scrunchies good for hair explores it.
Wavy, curly, and coily hair types possess built-in architectural volume that brings rich character to a half-up ponytail. Natural curl patterns interlock, often giving some organic grip that helps hold accessories in place. When working with curls or coils, avoid pulling the top section taut with a dense brush. Instead, rake your fingers through the top section to gather curls into the ponytail while preserving their three-dimensional spiral pattern and soft perimeter tendrils.
| Hair Texture & Type | Parting Style | Fastener Selection | Studio Balancing Tip |
|---|---|---|---|
| Fine Straight Hair | Shallow temple sweep | Embroidered button hair ties or snap clips | Avoid heavy accessories that slide down smooth hair shafts. |
| Thick Straight Hair | Tiered horizontal section | Linen bow scrunchie | Split the crown into two soft tiers to disperse heavy downward weight. |
| Wavy Hair (Type 2) | Soft arched crescent | Oval linen barrette (~3.5 × 1.5 in) | Release temple tendrils before gathering to highlight natural wave patterns. |
| Curly Hair (Type 3) | High crown horseshoe | Soft fabric scrunchie or claw clip | Gather loosely with fingers to prevent disturbing the curl clump definition. |
| Coily Hair (Type 4) | Curved temple-to-vertex | Wide fabric band or knot tie | Maintain hydration at the roots and avoid tight tension on delicate edges. |
| Shoulder-Length Lob | Semi-circle crown gather | Hand-embroidered claw clip | Keep the parting high to prevent pulling short nape hairs upward. |
| Long Heavy Strands | Angled diagonal gather | Linen bow scrunchie | Anchor firmly at the crown apex so the cascade balances downward drag. |
| Layered Haircut | Ear-line curved sweep | Set of embroidered snap clips (~7 cm) | Use small decorative clips to catch shorter side layers near the ear. |
| Fine Wavy Hair | Mid-crown triangle | Oval linen barrette with rosette | Fasten gently across the gather without flattening the wave crests. |
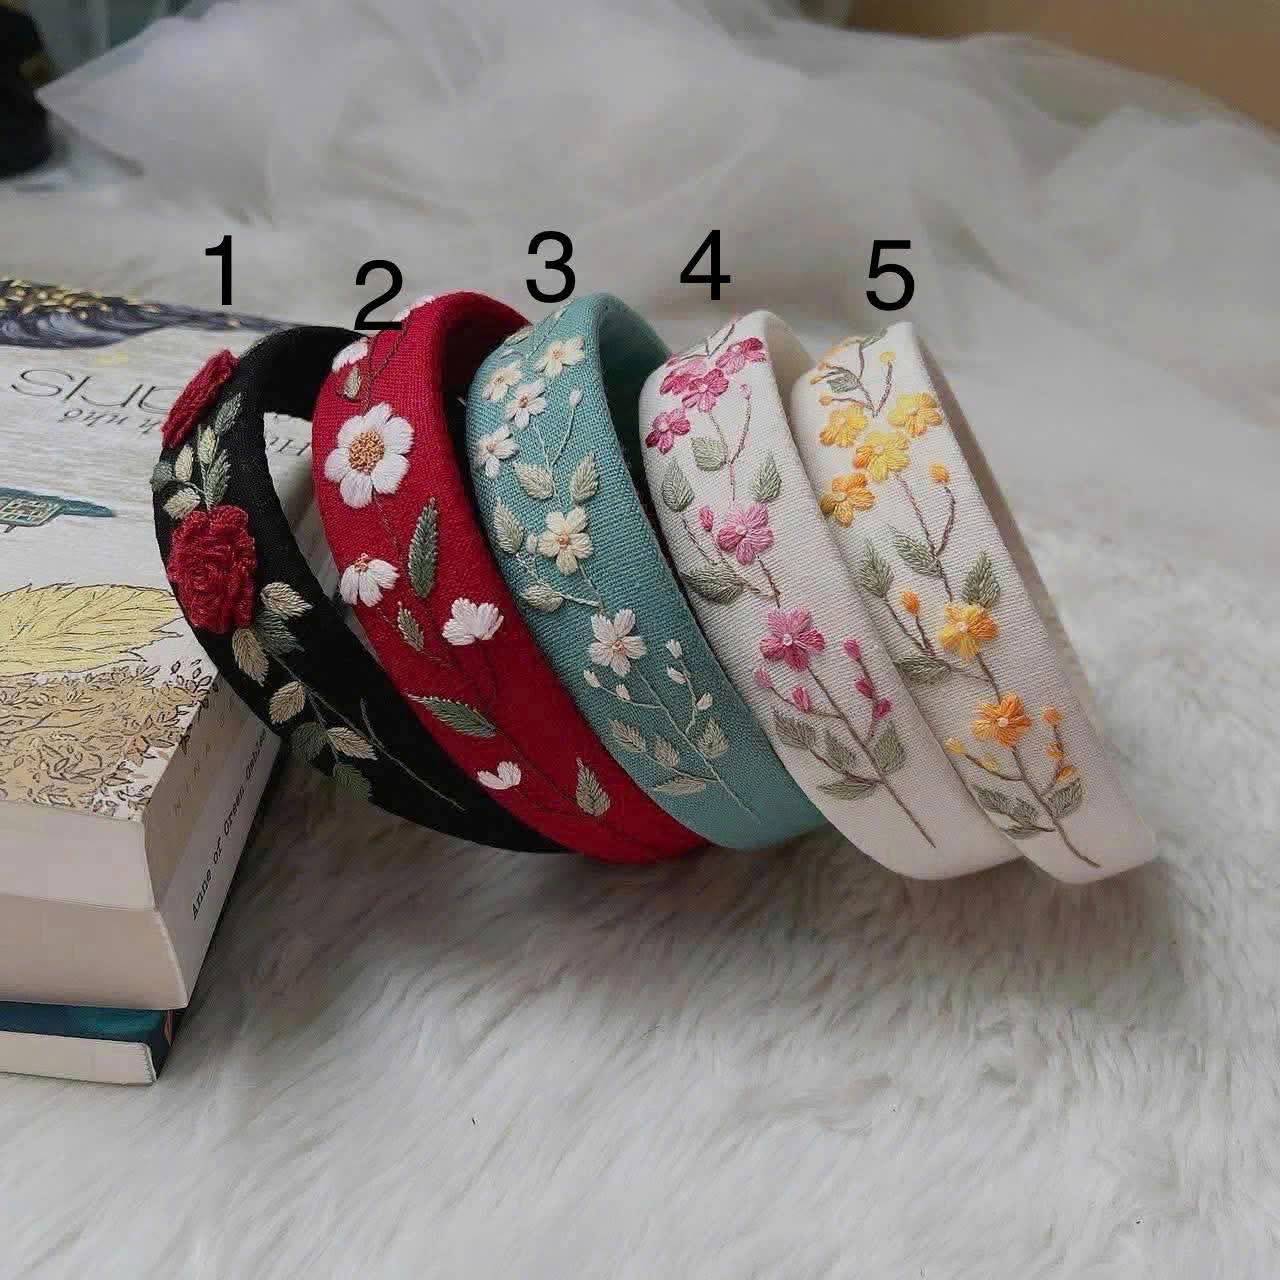
Wildflowers Embroidered Headband
Hand-embroidered on natural linen with a soft, stretchy band measuring 1.2 in (3 cm) wide, this botanical piece frames a half-up ponytail with a handcrafted floral accent. Most items are under $25.
How to Style a Ponytail and Hair Down: Step-by-Step Guide
Styling a ponytail and hair down look involves prepping hair texture, partitioning an intentional crown section, anchoring the base with low tension, and softening perimeter lines. Following a deliberate sequence helps balance the weight and keep the silhouette relaxed.
Creating an enduring half-up ponytail is less about complex styling tools and more about mindful tension control. When hair is gathered too quickly or pulled aggressively, the upper section can sag by midday, pull at delicate follicles along your hairline, or cause scalp fatigue. A methodical routine takes only a few minutes and can give you a steadier anchor while still looking naturally undone. For a more textured take on gathering the crown, try our twist ponytail styles.
Whether you are styling freshly washed hair or refreshing second-day waves, having your handcrafted accessories ready makes styling easier. In our Ho Chi Minh City studio, we hand-embroider accessories for relaxed, everyday routines, mostly on natural linen.
Step 1: Prep and Untangle with Texture-First Readiness
Begin by gently detangling your hair from the ends upward toward the roots using a wide-tooth comb or your fingers. Starting at the bottom prevents small knots from compounding into larger snags along your hair shaft. If your hair is straight or fine, mist your roots lightly with a dry texturizing spray or sea salt water to add subtle tactile grip, which can help keep accessories from slipping.
For wavy, curly, or coily hair, work a pea-sized dab of botanical hair balm or leave-in conditioner through your mid-lengths and ends to seal in moisture and define your natural curl clumps. Avoid applying heavy oils or waxes directly at the crown or hairline, as excess oil can cause hair ties to slide and make the top of your head look flat instead of softly lifted.
Step 2: Establish the Parting Line and Gather the Crown
Place your thumbs just above the arches of your eyebrows or at the tops of your ears, depending on how full you want the ponytail to appear. Trace your thumbs backward along your scalp toward the crown, meeting in the middle to scoop up the upper canopy of hair. Using your thumbs rather than a fine-tooth comb creates a softer, more organic separation that avoids harsh scalp lines.
Hold the gathered hair in one hand and check your profile in a mirror. Check that the parting line slopes slightly upward toward the crown. This upward angle can lift the eye and create an elegant profile. If you notice lower strands being tugged upward uncomfortably, release them with your free hand so only the true upper canopy remains in your grasp.
Step 3: Secure the Base with Low Tension
Wrap a fabric-covered hair tie or linen bow scrunchie around the gathered base, or close a claw clip across it. When securing the fastener, aim for snug support rather than tight compression. Fastening hair ties too tightly against the scalp exerts continuous stress on root follicles, which can lead to headaches or scalp irritation. You can see our handmade hair ties here, including fabric-covered styles and scrunchies.
Hair pulled back tightly over and over can cause traction alopecia. To go easy on your hairline, secure your fastener just tight enough to prevent slippage. Once the tie is in place, slide two fingers underneath the gathered base and ease it outward slightly to release any concentrated pulling on your scalp.
Step 4: Soften the Frontal Perimeter and Frame the Face
A rigid, slicked-back half-up ponytail can appear harsh. To create a softer, romantic silhouette, gently tease out a few whisper-thin strands around your temples, sideburns, and hairline using the pads of your fingers. If you like soft face-framing pieces, our fringe and ponytail guide shows another way to frame the face.
Place your palms flat against the sides of your head and gently rub upward in small circular motions to encourage natural baby hairs to loosen. You can also pinch small sections of hair along the top of your head and gently pull them upward by a fraction of an inch. This subtle ballooning technique builds airy volume at the crown and helps keep your hairstyle from looking plastered down.
Step 5: Incorporate Botanical Linen and Bow Accents
Complete your ponytail and hair down hairstyle by positioning your decorative accessory. If you are using a linen bow scrunchie, adjust the bow so it sits softly over the cascading lengths beneath, adding an artisanal cottagecore touch. Wrap it loosely rather than tightly. You can see our hand-embroidered silk scrunchie here, which adds a botanical touch to a half-up style.
If you prefer framing your face with a floral headband, slide the band into place starting about one inch behind your hairline, pushing it back gently so your loosened face-framing strands stay in front. Alternatively, place an oval linen barrette with rosette embroidery directly over the elastic base of the ponytail to conceal plain elastics while introducing botanical elegance to your everyday look. You can also see our linen bow scrunchie here, a soft way to cover a plain elastic.
Studio Tips for Half-Up Styles
A comfortable-feeling half-up ponytail starts with minimizing root strain, choosing fabrics with a little texture, and distributing weight evenly across the crown. These practical studio techniques can help keep the gathering from sagging.
In our studio, we hand-embroider accessories in small batches and like to think about how they sit with real hair. A half-up style rarely lasts longer by clamping hair down harder; it usually helps to work with the natural direction of hair growth and use fabrics that hold through gentle friction rather than pinching pressure.
The Two-Finger Slide for Crown Lift: After fastening your half-up ponytail with a scrunchie or tie, place your index and middle fingers beneath the ponytail base right against your scalp. Gently push the base upward by half an inch while holding the ends of the ponytail with your other hand. This simple adjustment can lift crown height, ease root tension along your forehead, and create an airy, romantic drape.
The Anchor-and-Wrap Scrunchie Method: If your hair is fine and silky, standard fabric scrunchies can slowly drift downward over several hours. To help with this, loop a thin fabric tie once around your half-up section to create an anchor, then slide a linen bow scrunchie or a wildflower-embroidered scrunchie over it. The inner tie gives extra grip, while the outer scrunchie adds soft volume and botanical charm. If you love a retro feel, explore these 90s hairstyles with scrunchies for more ways to wear them.
Stacking Embroidered Snap Clips for Stray Side Layers: When wearing a half-up ponytail with a layered haircut or grown-out bangs, shorter side pieces often slip out above the ears. Instead of using stiff hairspray or pulling the ponytail tighter, secure escaping strands with a pair of embroidered snap clips (about 7 cm each). Placing the clips just above your ears can keep layers tidy while adding delicate floral detail to your profile.
Restoring Afternoon Volume Without Full Re-Tying: When a half-up ponytail begins to feel flat after hours of desk work or errands, resist the urge to take it down completely and pull it tighter. Instead, flip your head forward, slide your fingers underneath your open lower lengths, and gently massage your scalp at the nape. When you flip back up, cup the ponytail base in your palm and lightly lift it toward the ceiling to revive crown bounce while keeping hairline tension low.
Common Half-Up Styling Mistakes and Solutions
Common mistakes when creating a ponytail with hair down include gathering past the ear line, overtightening the elastic anchor, and using smooth synthetic bands that slide against hair shafts. Adjusting your sectioning depth and choosing softer fabric ties can help keep the style steady and gentler on your hair.
Some women give up on half-up hairstyles because they feel a dull ache at the crown or find their hair sagging into a shapeless clump. These issues often come from small errors during the initial gathering. Understanding these common missteps can make half-up styles easier to enjoy.
Mistake: Gathering Too Deep Below the Occipital Ridge. Scooping hair from too far down your neck leaves the lower cascade looking sparse, stringy, and unbalanced, while placing excessive weight into the half-up ponytail. The fix: Keep your sectioning line at or above the tops of your ears. Gather only the top third of your hair volume, leaving the entire lower two-thirds free to maintain a lush, full appearance across your shoulders.
Mistake: Pulling the Ponytail Base Tightly Against the Scalp. Cinched elastics pull hair follicles backward, creating uncomfortable scalp tension that can strain the hairline over time. The fix: Fasten your tie with moderate snugness, then pinch and pull upward on small crown sections to introduce slack. If you ever feel scalp soreness or a tension headache developing, take the accessory off, massage your scalp gently, and see a doctor or dermatologist if it continues.
Mistake: Using Rigid, Unyielding Fasteners on Fine Strands. Hard plastic elastics and sharp-toothed metal clasps can pinch hair shafts, causing friction breakage and slippage on smooth, straight strands. The fix: Choose accessories wrapped in natural woven fibers like linen or soft cotton. Linen has a natural, slightly textured surface that can give hair some grip without clamping it, which can help keep your ponytail and hair down look in place.
Ponytail and Hair Down FAQ
Can I wear a ponytail and hair down hairstyle with fine or thin hair?
Yes, fine hair can pair well with a half-up ponytail when you use a shallow temple-to-crown gather. Gathering roughly one-third of your hair volume keeps the majority of your strands flowing underneath, preserving density in your cascading lengths. Using an embroidered claw clip, which suits half-up styles and fine hair, adds visual texture.
How do I prevent a half-up ponytail from pulling or causing tension headaches?
Keep tension low by gathering hair with your fingers rather than a tight brush, and avoid overtightening your hair tie. Once secured, slide two fingers under the anchor and gently loosen the roots at your crown. If you ever experience scalp tenderness or a persistent headache, take the accessory off right away, give your scalp a gentle massage, and see a doctor or dermatologist if it continues.
What is the difference between a half-up ponytail and a classic ponytail with hair down?
The terms are often used interchangeably, but a ponytail and hair down style specifically refers to securing only the crown and upper temple sections while allowing the lower occipital and nape lengths to flow freely. This combines the clean face-framing lift of an updo with the movement and softness of open hair.
How do I keep botanical embroidered hair accessories clean after all-day wear?
Because our pieces are embroidered by hand on natural linen, they require gentle handling. We advise spot cleaning only. Lightly dab any spots with a clean cloth dampened with cool water, then allow the accessory to air dry completely away from direct heat. Never machine wash or soak hand-embroidered items, as this can distort delicate thread tension.
Can short hair or a shoulder-length bob work with a half-up ponytail?
Short bobs and shoulder-length lobs look charming with a half-up gathering. Keep the sectioning line high on the head, gathering hair only from the temples and vertex. This helps keep the shorter hairs at your nape from being pulled upward into an awkward bunch, allowing your bob to frame your jawline naturally.
Embracing Gentle Hair Artistry with BabunobGem
Finding balance in your daily styling begins with gentle techniques and intentional details. At BabunobGem, we stitch our floral hair accessories by hand in our Ho Chi Minh City studio, mostly on natural linen. Most items are under $25. US shipping is $7 for the first item and $1 for each extra item. Orders are usually prepared in 1–3 business days, and US delivery is estimated 10–14 business days, with tracking. Returns within 30 days under our Return Policy.
New here? Get 10% off your first order
Join our list for new small-batch designs and restocks, or browse the collection now.
Note: Each piece is embroidered by hand, so stitches and colors can vary slightly from the photos. Fit and feel depend on head size, hair type and how you wear it. This guide is for general information only.