
How to Do a Beaver Tail Braid
Beaver tail braid styling combines an intricate two-strand herringbone weave with gentle pancaking to form a wide, paddle-shaped silhouette. Written for anyone who likes a romantic cottagecore look, this practical guide from BabunobGem shows you how to section cleanly, keep tension balanced, and finish your plait with a soft fabric tie.
Key highlights
- Master the mechanical difference between a standard tubular fishtail and an expanded, paddle-flat beaver tail silhouette.
- Follow our six-step tutorial covering prep, micro-strand crossing, and bottom-to-top horizontal pancaking.
- Explore versatile styling variations including romantic side-swept plaits, half-up cottagecore weaves, and low chignon updos.
- Learn hands-on studio tips to reduce strand slippage, manage uneven layering, and keep tension on the scalp low.
Understanding the Beaver Tail Braid: Weave Dynamics and Silhouette
A beaver tail braid is an ultra-wide, paddle-shaped hairstyle created by pairing a dense two-strand exterior weaving pattern with deliberate horizontal pancaking. Unlike standard tubular plaits, its flattened architecture distributes hair laterally to showcase detailed strand interlacing and dramatic visual breadth.
In classical and contemporary styling, the beaver tail braid takes its name from the flat, paddle-like appearance of a beaver’s tail. Traditional three-strand braids produce a cylindrical rope that rests narrowly down the back. In contrast, the beaver tail style spreads the woven mass outward across a flat plane. Stylists achieve this look through a specialized two-strand herringbone foundation, where hair transfers exclusively from the outermost edges across into the opposing section.
The secret behind this distinct aesthetic lies in the surface area created by thin strand transfers. When you weave using slender subsections, the braid forms dozens of microscopic intersecting ridges. Once gently pulled outward, these micro-ridges fan out into an expansive, textured tapestry. It sits between romantic, vintage-inspired styling and modern bohemian looks, offering an eye-catching alternative to everyday three-strand plaits.
The Structural Geometry of Wide Paddle Braids
The primary architectural distinction of the beaver tail braid is its aspect ratio. While a classic French or English plait maintains a balanced depth-to-width ratio, a beaver tail plait prioritizes horizontal expansion over thickness. When you weave hair into two main columns and pass tiny outer ribbons across, the core of the braid remains relatively thin. This internal lightness allows you to grip the outer loops and pull them horizontally without pulling the entire weave apart. The result is a broad, ribbon-like structure that lies flat against the nape or shoulder, which can avoid the bulky protrusion sometimes seen with thick three-strand or multi-strand variations.
Strand Sizing, Porosity, and Grip Mechanics
Achieving a symmetrical paddle shape depends heavily on strand sizing and hair cuticle friction. Taking sections that are too thick produces a chunky plait that resists flat fanning, while overly thin strands on fine hair can dissolve into wispy flyaways. Ideally, transfer pieces should measure roughly one-fourth of an inch. Hair texture also dictates stability; freshly washed, glossy strands lack the natural traction needed to hold an expanded loop in place. Medium to high-porosity strands or second-day hair provide subtle cuticle grab, which can help the pancaked ridges of the beaver tail braid keep their broad silhouette.
| Braid Style | Strand System | Visual Silhouette | Fastener Option |
|---|---|---|---|
| Beaver Tail Braid | Two-strand exterior cross with horizontal loop pancaking | Ultra-wide, flattened paddle profile | Silk or linen scrunchie |
| Classic Fishtail Braid | Standard two-strand exterior cross without expansion | Narrow, tubular herringbone column | Clear micro elastic |
| Traditional 3-Strand Plait | Alternating three-strand crossover | Medium-width rounded rope | Standard hair tie |
| French Braid | Three strands crossing over while gathering scalp hair | Flush, tapered crown-to-nape ridge | Fabric-wrapped band |
| Dutch Inverted Braid | Three strands crossing under while gathering scalp hair | High-relief, three-dimensional pop | Linen bow scrunchie |
| 4-Strand Flat Braid | Four intertwined strands with over-under weave | Flat, belt-like woven strap | Soft elastic band |
| 5-Strand Ribbon Braid | Five interwoven sections across a horizontal plane | Broad, basketweave tape silhouette | Soft fabric hair tie |
| Rope Twist Braid | Two sections twisted separately then twined together | Dense spiral cord with rotational torque | Fabric-covered hair elastic |
| Waterfall Braid | Modified French weave releasing lower strands freely | Cascading lace drape along crown | Small barrette or snap clip |
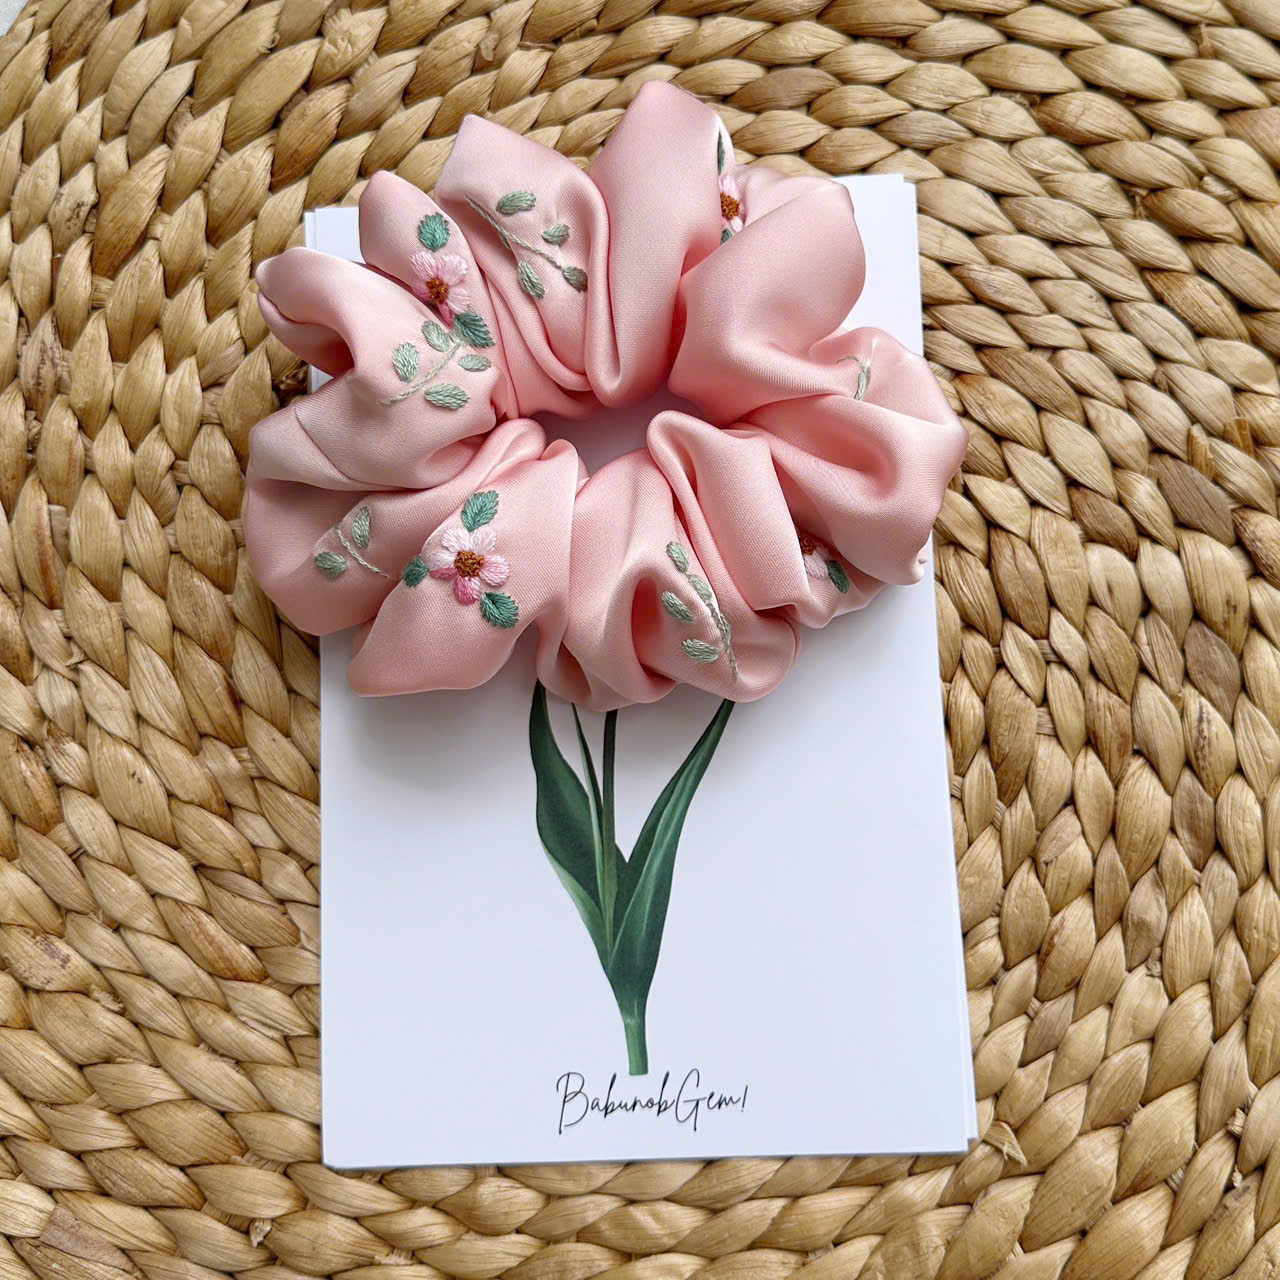
Hand-embroidered with botanical wildflowers and available in six colors, this scrunchie is an easy way to finish the tip of a plait with a botanical accent.
How to Do a Beaver Tail Braid: Step-by-Step Styling Tutorial
To do a beaver tail braid, divide detangled hair into two equal sections, cross slender exterior strands alternately into the opposite inner half, secure the tail with a gentle tie, and methodically pancake the outer loops outward from bottom to top.
Creating this eye-catching hairstyle requires patience, rhythmic hand movement, and the right styling setup. Before beginning, gather a wide-tooth detangling comb, a tail comb for clean parting, two duckbill sectioning clips, a light texturizing mist, and a gentle hair tie. While many tutorials suggest plastic rubber bands, thin, harsh elastics can pinch the fragile tail of your hair and may cause breakage when removed.
Evaluating your securing options helps you choose a tie that suits your hair. Clear plastic elastics are nearly invisible but can create friction against delicate ends. Coiled plastic cords can work for thick ponytails but may feel bulky on the tapered tail of an intricate plait. Soft fabric-covered fasteners, such as a wildflower scrunchie or a linen bow scrunchie, can be a good option for anchoring the weave. Select an accessory that suits your hair density and complements your overall aesthetic. Our overview of types of hair elastics compares the options you might use to secure the tail.
Step 1: Prep Hair Texture and Eliminate Snags
Begin by thoroughly detangling your hair from ends to roots using a wide-tooth comb. Any lingering knots will disrupt your strand transfers and cause uneven lumps along the edges of the plait. If your hair is freshly washed and feeling overly silky, mist the mid-lengths and ends with a lightweight texturizing spray or dry sea salt water. This step adds mechanical friction to smooth strands, which can help the outer weave stay put once expanded. Brush through once more to distribute the product evenly, creating a soft, workable matte grip without leaving stiff or sticky residue on your fingers.
Step 2: Partition Hair into Two Equal Halves
Gather all your hair at the nape of the neck or pull it over your preferred shoulder for a side-swept look. Using your index fingers or the tip of a rat-tail comb, divide the hair vertically down the center into two identical bundles: a left section and a right section. Symmetry at this foundation stage is essential; an uneven initial split can cause the beaver tail braid to tilt, curve, or roll awkwardly along one side rather than resting flat against your body. Smooth both bundles downward with your palms so no cross-strands tangle underneath.
Step 3: Begin the Micro-Exterior Strand Weave
Hold the left bundle securely in your left hand and the right bundle in your right hand. Using your right pinky finger, separate a small piece of hair—roughly one-fourth of an inch thick—from the outermost edge of the right section. Bring this slender piece over the top of the right bundle and merge it directly into the inner side of the left bundle. Next, use your left pinky to separate a matching one-fourth-inch strand from the far outer edge of the left bundle, cross it over, and blend it into the inner right section. This establishes your core herringbone rhythm.
Step 4: Maintain Rhythmic Hand Position and Tension
Continue alternating this crossing sequence down the entire length of your hair. Keep your hands resting close to your neck or collarbone rather than pulling the hair outward toward the mirror. Pulling hair away from your body creates loose, sagging loops along the underside of the weave. Maintain a moderate, uniform tension: pull each transfer strand snugly into place, but avoid yanking so hard that you strain your scalp. Consistency is far more critical than extreme tightness, as uniform tension helps every outer loop expand symmetrically during the subsequent pancaking phase.
Step 5: Anchor the Tail with Soft Ties
Weave the pattern downward until roughly two to three inches of unbraided hair remain at the bottom. Leaving this short tail gives you adequate leverage to hold the braid while fastening the ends. Secure the bottom snugly using a soft fabric tie, such as a wildflower scrunchie or a linen bow scrunchie. Avoid wrapping bare rubber bands directly onto dry ends, as the tension can snap fragile hair cuticles. Make sure your fastener wraps snugly enough to keep the lower herringbone stitches from unraveling while you handle the plait during the shaping step. If you are unsure how to wrap a tie, our guide on how to use a hair tie may help.
Step 6: Master Horizontal Pancaking for the Paddle Effect
Pancaking transforms an ordinary herringbone weave into a true beaver tail braid. Starting at the bottom of the plait just above your hair tie, use your thumb and index finger to gently grasp the outermost edge of a woven loop. Pull it horizontally outward by a quarter-inch to a half-inch. Work your way upward, one stitch at a time, teasing each consecutive loop outward. Working from bottom to top helps avoid tension buildup at the crown. Once you reach the top, return to any narrow spots and gently ease them wider until the entire braid forms a wide, flat paddle silhouette.
Variation 1: The Casual Side-Swept Beaver Tail
For an effortless daytime style, sweep all your hair over one shoulder before dividing it into working sections. Placing the braid at your side keeps the weaving process entirely within your line of sight in the mirror, making it a good option for beginners practicing strand control. Once woven and secured, pancake the side facing outward slightly more than the side resting against your neck. This intentional asymmetry accentuates the broad silhouette, framing your jawline and collarbone gracefully while complementing casual knitwear, floral blouses, and relaxed weekend outfits. For a simpler cousin of this look, see how to do the ponytail braid in our guide.
Variation 2: The Half-Up Cottagecore Beaver Tail
The half-up variation offers romantic charm while keeping front strands neatly secured away from your eyes. Part your hair horizontally from the top of each ear, gathering the upper crown section into two working halves while leaving the bottom lengths loose and flowing. Weave the upper section into a compact herringbone pattern down to the mid-back, fasten with a gentle tie, and pancake the edges wide. The contrast between the broad, structured woven paddle and the soft natural waves underneath creates a dreamy, vintage-inspired silhouette suited for outdoor gatherings and afternoon teas. You can also see our linen bow scrunchie here for a romantic touch on a half-up braid.
Variation 3: The French Beaver Tail Plait
The French beaver tail combines scalp-hugging French braiding with the paddle-shaped herringbone finish. Begin at the crown by taking a small horseshoe section of hair, splitting it in two, and establishing the herringbone cross. With each exterior strand transfer, gather a small ribbon of loose hair from along the hairline and incorporate it into the cross. Continue this feeding technique down the back of the head until reaching the nape, then finish with a standard two-strand weave. Pancaking the lower length creates an impressive structural shift from a sleek scalp weave to a dramatic paddle plait.
Variation 4: The Inverted Dutch Beaver Tail
For heightened three-dimensional surface texture, try crossing your outer transfer strands underneath the main sections rather than over the top. This inverted Dutch technique pushes the woven spine upward, creating pronounced tactile ridges along the center of the plait. When you pancake an inverted weave, the edges fan out into an exceptionally bold beaver tail braid that appears to hover above the back. This variation works especially well on thick, coarse, or highlighted hair, where the multi-dimensional ridges catch natural light and emphasize textural depth. If inverted weaves interest you, learn how to do a dutch braid on yourself as a helpful starting point.
Variation 5: Bohemian Double Beaver Tail Plaits
Double beaver tail pigtails give a youthful, pastoral look reminiscent of folk-inspired styling. Part your hair crisply down the center from forehead to nape, securing one side with a clip while you work on the other. Weave each side into a low, over-the-shoulder plait, keeping strand sizes delicate and even. After securing both tails with fabric scrunchies, fan each plait horizontally until they double in visible width. This double paddle configuration can sit beneath wide-brimmed hats and floral headbands. For double braids, you can see our hand-embroidered silk scrunchie here as one finishing option.
Variation 6: The Tucked Low Chignon Beaver Tail
Transform your casual plait into an elegant evening updo with the tucked chignon method. Weave a full beaver tail braid down the back of your head and pancake it generously to maximize width. Next, roll the secured tail inward and upward, tucking it neatly underneath the base of the plait at the nape of the neck. Secure the folded mass flat against the scalp using four to six sturdy bobby pins inserted horizontally. The resulting wide chignon resembles an intricate basketweave roll, offering an understated formal look for weddings and celebrations.
Studio Secrets: Practical Tips for Balance, Texture, and Grip
In our studio, we find that applying texturizing powder along slippery layers, checking width with dual mirrors, and fanning loops from bottom to top can help you build a stable, symmetrical beaver tail braid.
In our studio, we make hair accessories and enjoy styling hair, and small technical adjustments can make a braid look neater for longer. Braiders often struggle when their hair lacks tactile friction or when they rush the pancaking phase. Mindful styling principles, such as preparing strand grip and monitoring hand tension, can make braiding a calmer self-care ritual. You can browse our handmade hair ties here to find a finish for your braid.
The “Micro-Pinch” Pancaking Sequence. In our studio, we always pancake from the bottom hair tie upward. Tugging from the top first steals slack from lower loops, creating uneven gaps along the mid-shaft. Lightly pinch only the outermost two or three hairs of each cross rather than pulling the entire section. This delicate micro-pinch expands the outer margin into a broad paddle while leaving the structural core dense and stable.
Pre-Grip with Botanical Sea Salt Mist. Naturally straight or fine hair easily slips out of an expanded weave. Lightly spritzing damp lengths with a mineral or sea salt mist before blow-drying establishes microscopic tactile texture along each cuticle. This added mechanical traction can help keep newly pancaked loops from slowly sliding back toward the center of the plait as you move through your day.
Double-Mirror Symmetry Monitoring. Because the beaver tail braid is prized for its broad horizontal profile, one side can easily turn out wider than the other if your dominant hand applies uneven force. Set up a handheld mirror opposite your bathroom wall mirror. Pause every two inches of weaving to check width consistency, adjusting your tension immediately rather than attempting to fix an asymmetrical braid after tying it off.
Balancing Wide Plaits with Hand-Embroidered Accents. When anchoring a broad paddle braid, tiny clear elastics often look visually pinched and out of proportion against the wide woven texture. Wrapping a hand-embroidered wildflower scrunchie or a linen bow scrunchie around the tail creates a balanced visual finish. The soft textile softens the transition from the wide plait to natural ends. Soft fabric ties can finish wide plaits nicely, as our scrunchie for braids guide explains.
Common Beaver Tail Braid Mistakes and How to Avoid Them
Common beaver tail braid mistakes include inconsistent strand thickness, pulling sections outward away from the neck, and applying extreme root tension that can cause scalp irritation.
Braiding requires coordinating muscle memory, hand placement, and strand awareness. When learning how to do a beaver tail braid, it is natural to encounter minor setbacks such as spiraling weaves, protruding layers, or scalp tenderness. Recognizing these common errors early lets you adjust your technique and aim for a balanced hairstyle that feels comfortable.
Mistake: Grabbing Inconsistent Strand Thicknesses. Crossing a thick section from the left followed by a skinny sliver from the right throws off the herringbone geometry, causing the braid to curl or twist like a corkscrew rather than lying flat. The Fix: Calibrate your fingers to gauge strand size. Use the tip of your pinky nail as a measurement guide, keeping each transfer piece consistently between one-fourth and one-third of an inch thick from start to finish.
Mistake: Pulling Strands Outward Toward the Mirror. Angling your hands outward away from your neck while braiding creates loose, bagging slack along the nape. Once you release the hair, this excess slack bulges into an unsightly bump beneath the braid. The Fix: Keep the backs of your hands touching your neck or collarbone as you work. Weaving flush against your body maintains proper directional tension and keeps the plait resting cleanly along your back.
Mistake: Excessive Tension and Scalp Pulling. Braiding too tightly at the hairline strains delicate follicles and can cause discomfort. Hair pulled back tightly over and over can cause traction alopecia. The Fix: Keep your root tension gentle and relaxed, relying on texturizing spray rather than tight pulling for hold. If you experience scalp tenderness or a headache, take the braid out. If it continues, see a doctor or dermatologist.
Beaver Tail Braid FAQ
How is a beaver tail braid different from a classic fishtail braid?
Both styles utilize a two-strand herringbone weaving foundation, but their final geometry differs completely. A classic fishtail braid is kept tightly compressed and tubular, producing a narrow, rope-like column. A beaver tail braid uses specialized horizontal pancaking along the outer edges to flatten and fan the weave into an expanded, paddle-shaped profile resembling a beaver’s tail.
Can I do a beaver tail braid on fine or thin hair?
Yes, fine hair can work well with the beaver tail technique because horizontal pancaking can create the look of greater volume. To make it work, apply a texturizing powder or dry shampoo to give fine strands mechanical grip. Keep your transfer strands very thin, and pancake gently so you do not pull the weave apart completely.
Why does my beaver tail braid keep twisting into a spiral?
Twisting occurs when the tension between your hands is uneven, or when transfer strands on one side are noticeably thicker than on the other. Make sure both main bundles hold equal hair volume, cross transfer pieces of identical thickness, and keep your hands resting flush against your body rather than rotating the plait as you weave.
How do I keep short layers from poking out of my beaver tail braid?
Shorter layers can pop out when the weave is fanned wide. To manage this, warm a small dab of styling balm or pomade between your fingertips before braiding to bind shorter ends to longer strands. When pancaking, pull gently from the very outer edge, avoiding the central spine where shorter layers end.
What is a gentle way to secure the end of a beaver tail braid?
Fasten the ends with a soft, fabric-covered accessory rather than exposed rubber elastics. A handcrafted wildflower scrunchie or linen bow scrunchie is one option, and wrapping it loosely can help limit tension creases.
Elevating Your Everyday Braid with Handcrafted Hair Accents
Learning the beaver tail braid lets you turn standard two-strand weaving into a broad, artistic statement for everyday moments and special events alike. At BabunobGem, our small Ho Chi Minh City studio hand-embroiders scrunchies and other hair accessories in small batches to go with your styling routine. Orders are usually prepared in 1–3 business days. US delivery is estimated 10–14 business days, with tracking.
New here? Get 10% off your first order
Join our list for new small-batch designs and restocks, or browse the collection now.
Note: Each piece is embroidered by hand, so stitches and colors can vary slightly from the photos. Fit and feel depend on head size, hair type and how you wear it. This guide is for general information only.